ConvertKit API
If you don't already have a ConvertKit account, now is a good time to create it.
From ConvertKit you will need 3 variables:
CONVERTKIT_API_URLCONVERTKIT_API_KEYCONVERTKIT_FORM_ID
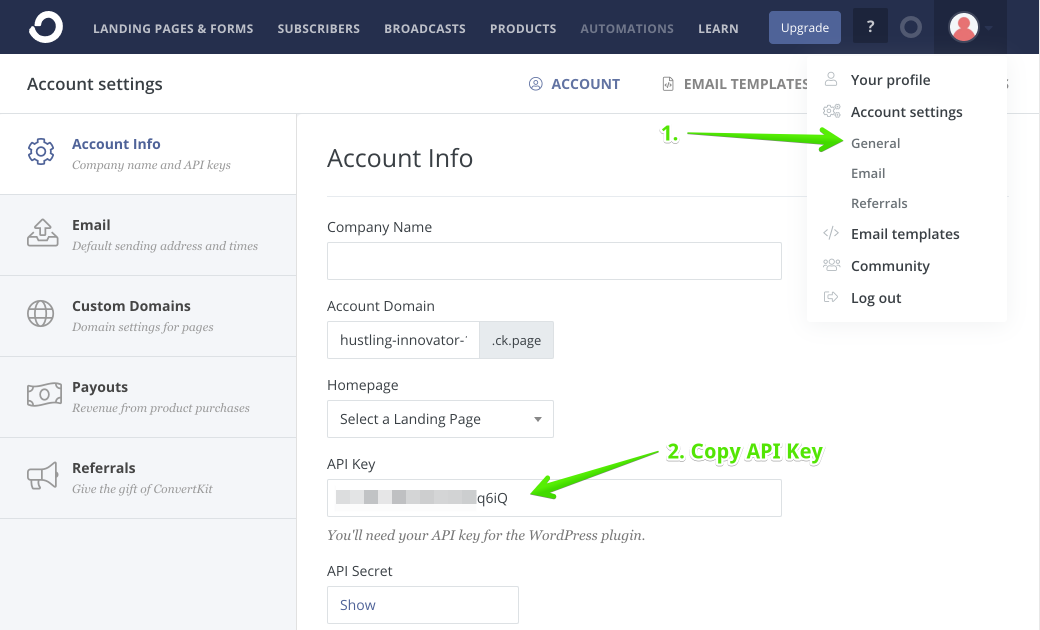
Get CONVERTKIT_API_KEY
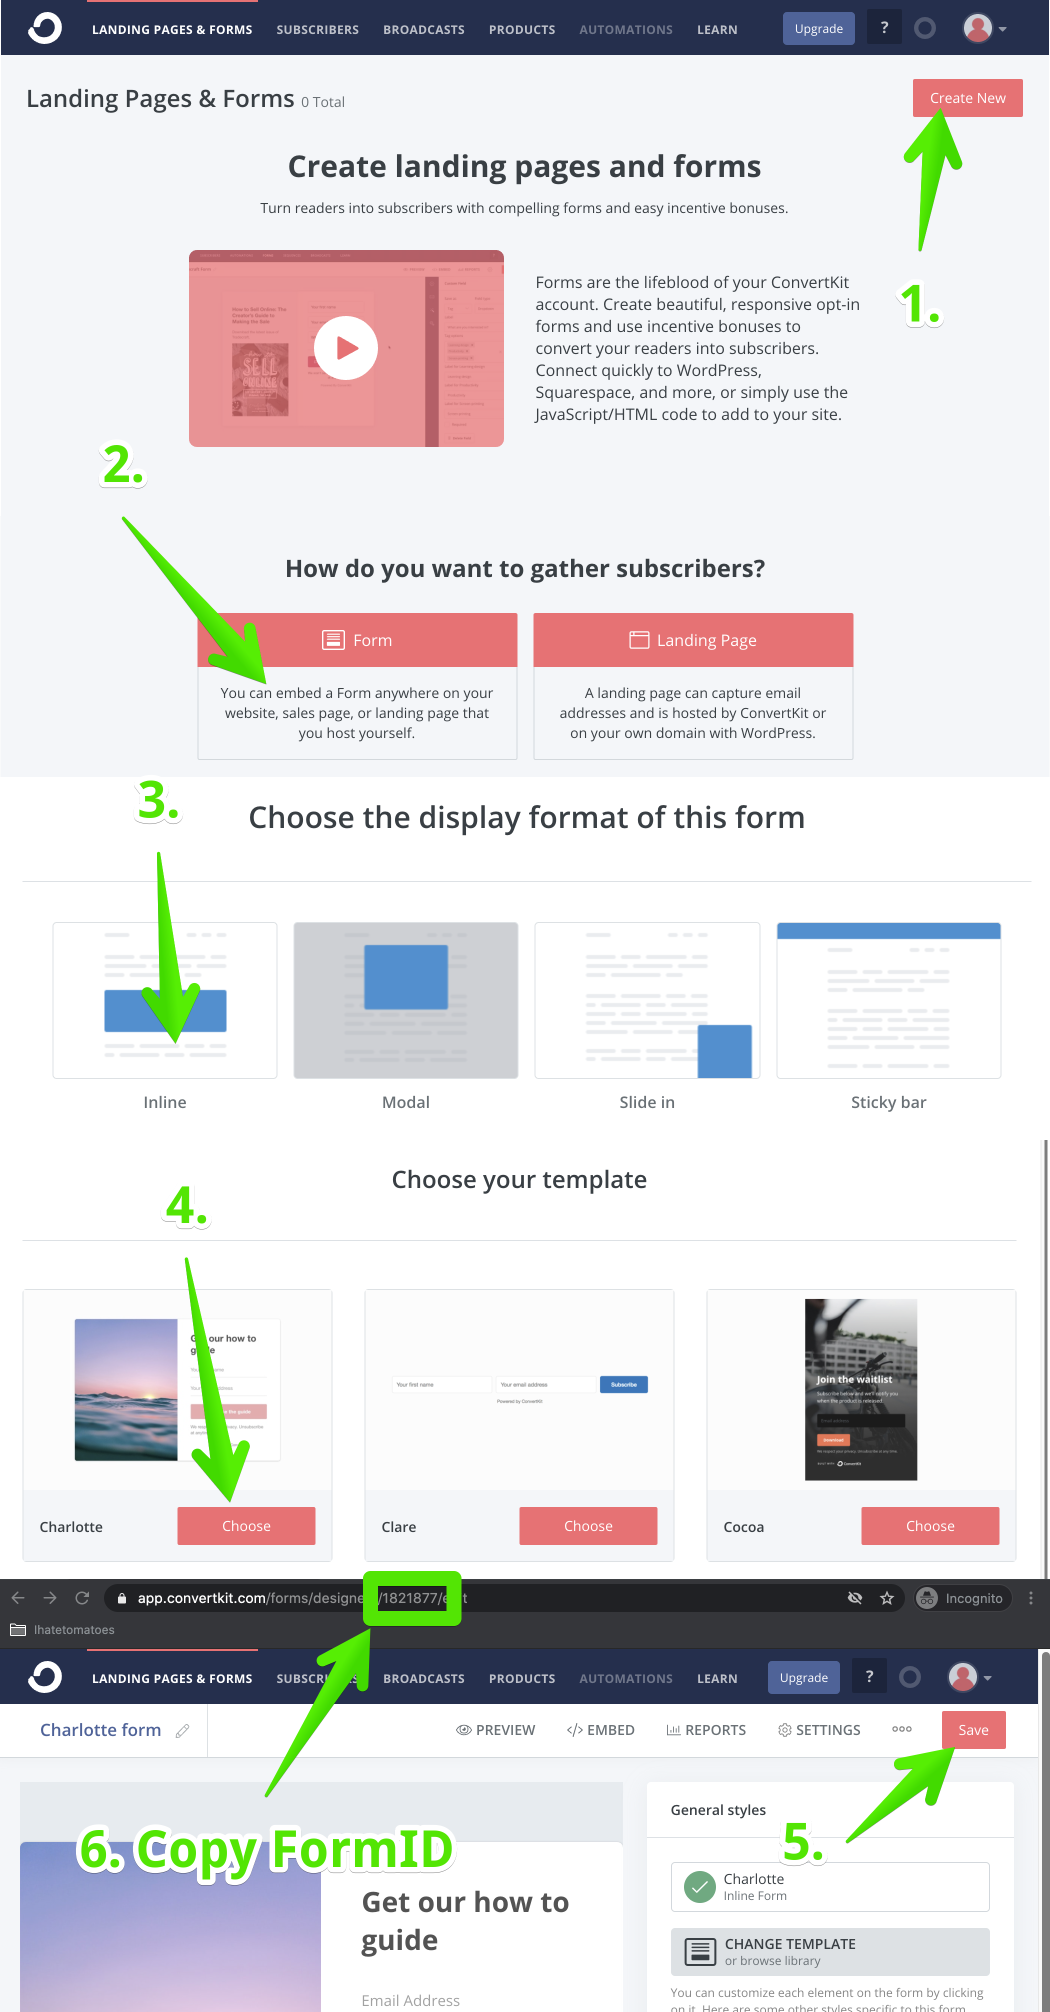
Get CONVERTKIT_FORM_ID
Create .env.local
We will take these variables and store them in .env.local, this is a file containing all environment variables for our project.
It should be in the root directory of your project.
.env files should never be checked out to your repository, make sure they are included in .gitignore. Create Next App automatically does this for you.
Once we deploy our project to Vercel we will need to configure all these variables on the server too.
Your .env.local should look something like this:
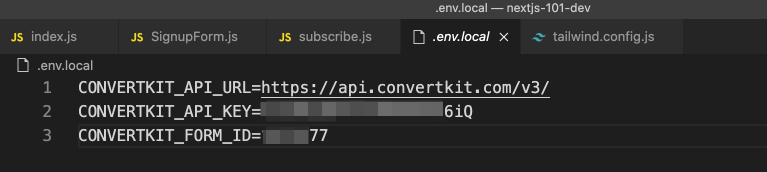
// .env.local
CONVERTKIT_API_URL=https://api.convertkit.com/v3/
CONVERTKIT_API_KEY=abc
CONVERTKIT_FORM_ID=123
We will talk more about Environment Variables in the next few units.
Validating API via Postman
Before we create the endpoint, lets validate that we have the right data.
You don't need to do this step, but sometimes it is handy to check that the endpoint works fine and Postman is a great tool for that.
Method: POST
URL: https://api.convertkit.com/v3/forms/[formID]/subscribe
Request body JSON
{
    "email": "youremail@gmail.com",
    "api_key": "YOURAPIKEY"
}
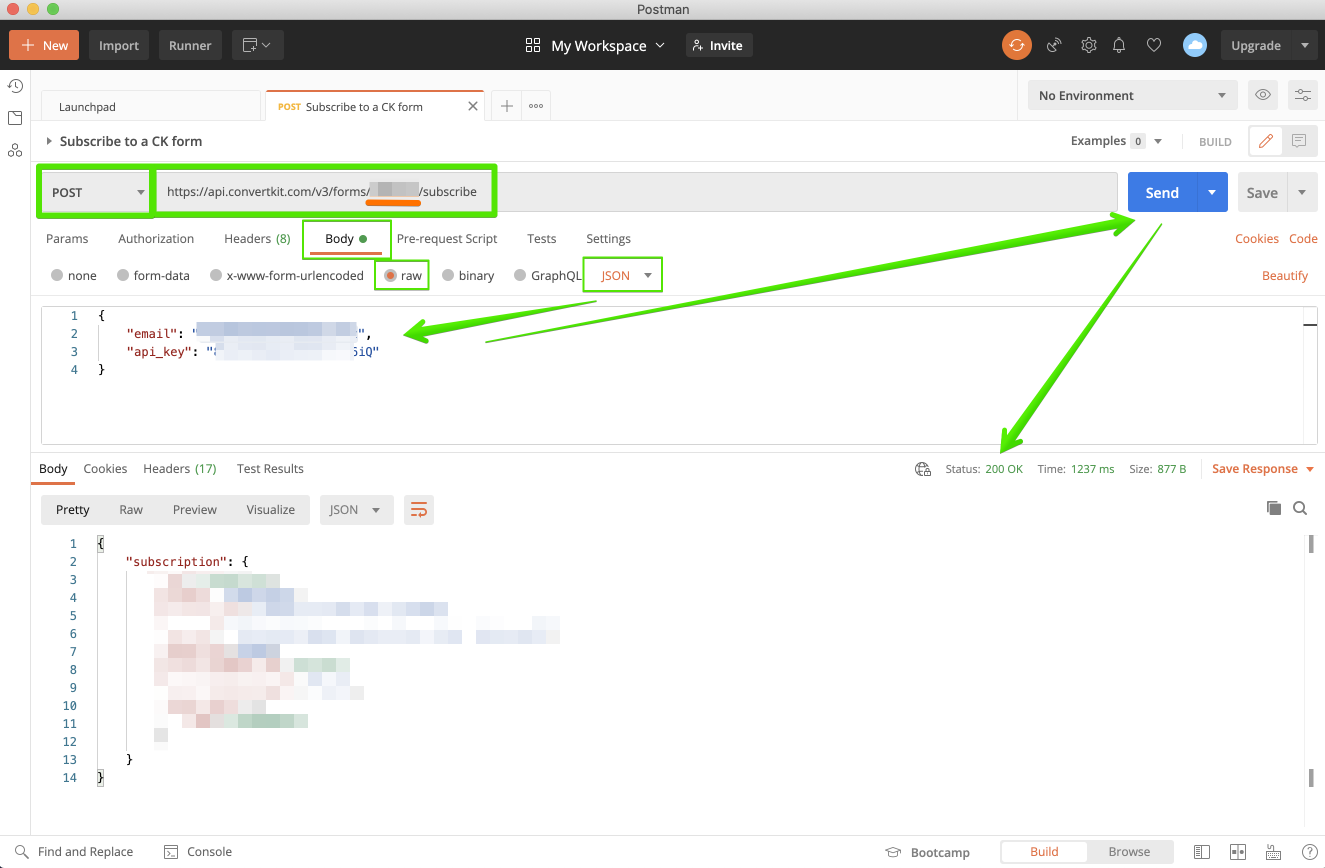
With the correct details we are getting back Status: 200 OK!
The user will recieve a confirmation email and needs to confirm it to be added to ConvertKit.
Now we have all the information required to create our Subscribe API endpoint.