GitHub
Commit all your local changes and push them to GitHub. Now we are ready to connect the repo with Vercel.
Vercel GitHub Integration
Vercel has a great integration with GitHub and lets you automatically deploy your changes on every PR. The setup is quite easy too.
Vercel
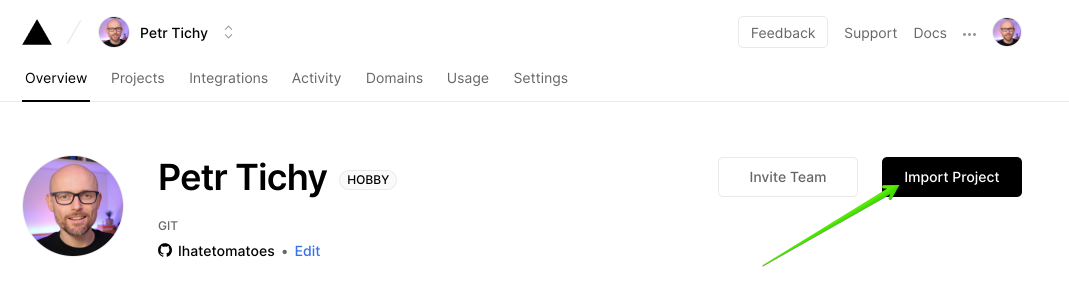
Login to your Vercel account and click on Import Project, on the following screen you will be prompted to authorize Vercel to access your GitHub account.
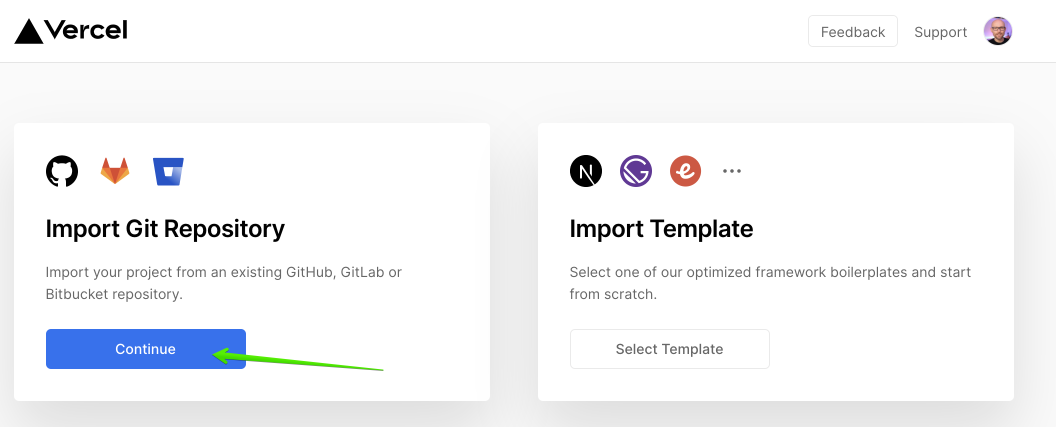
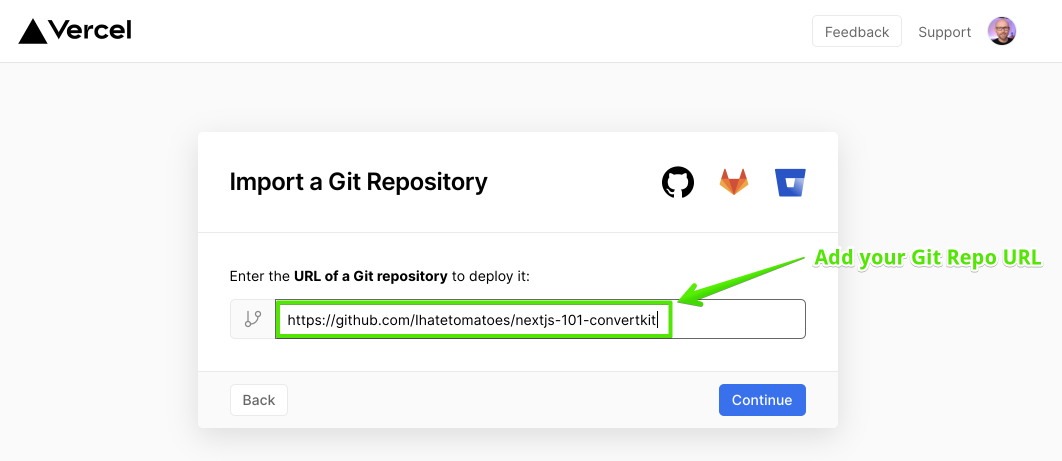
Once you do that, you should be able to enter a repository URL that you want to import to Vercel.
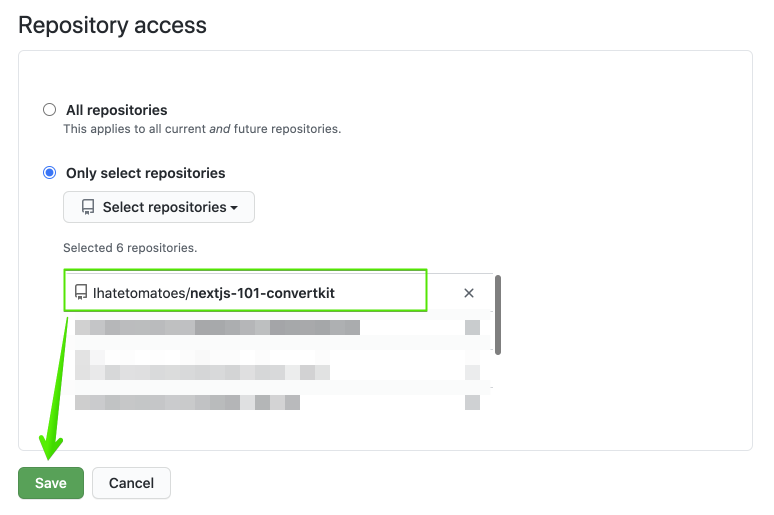
If you didn't choose All repositories access when connecting Vercel, you will get the following prompt. This means that the repo you are trying to import is not accessible by Vercel.

You will need to add it to the list of repositories Vercel can access. Go to Settings > Applications > Vercel > Configure, and add your repo to the list.
Import Project
Once Vercel can access the repository you will be asked for some more details.
Vercel is optimized for Next.js so you can safely accept the default settings.
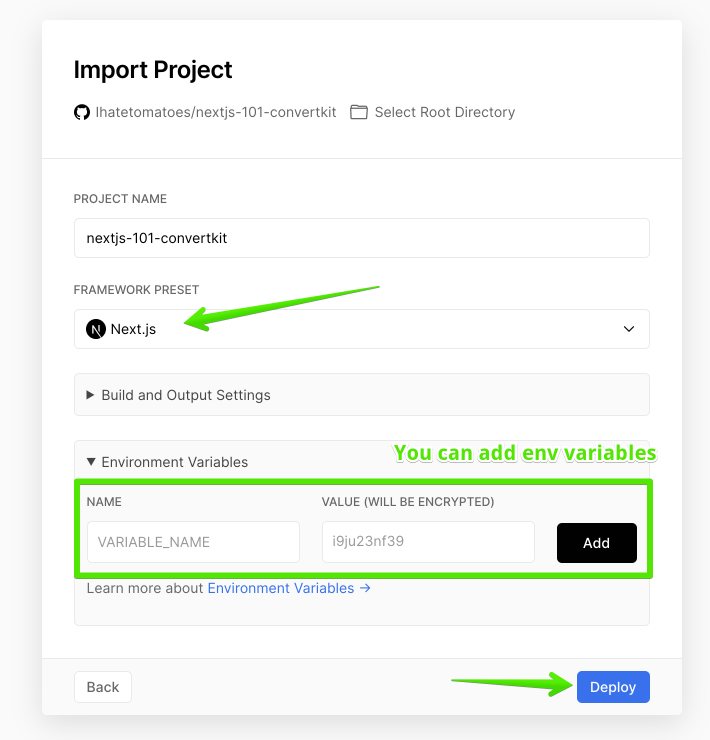
We can also add all 3 environment variables that we will need for our ConvertKit form to work.
At this stage Vercel will:
- import your GitHub repository,
- run the build command,
- deploy the resulting app
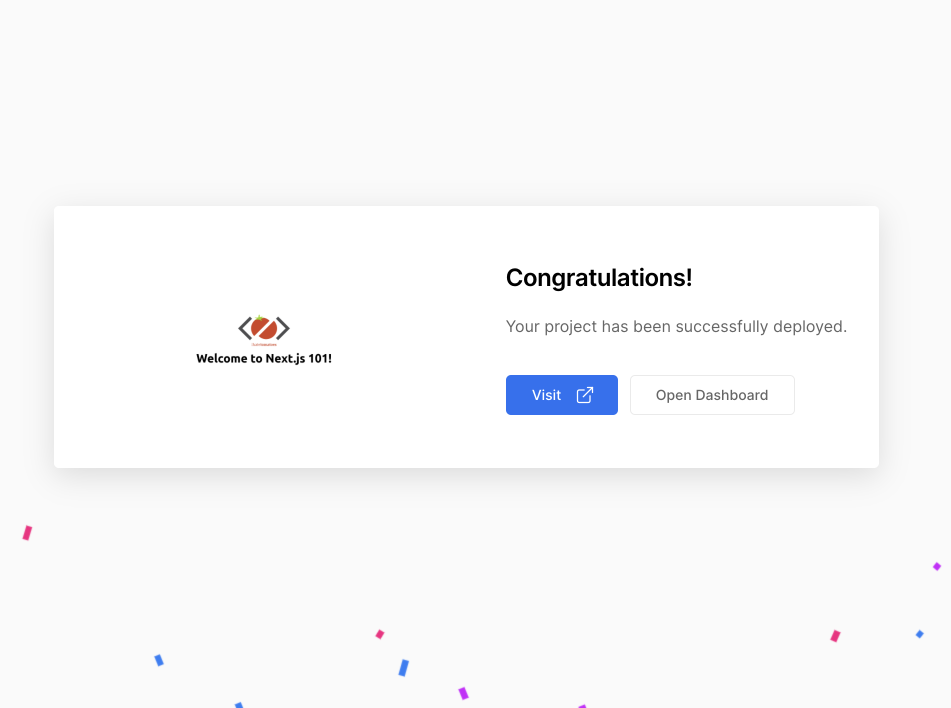
Successful Deployment
At the end of a first succesful deployment you will see a nice confetti celbration.
I have only caught the end of it in the following screenshot :)
Now the master branch of our project is deployed and accessible by anyone.
You can read even more about Vercel Deployments in the official documentation.
Preview Deployment
Every commit on every branch will result in an automatic preview deployment, this is a great way to check that everything looks and works as expected.
The preview deployemnts are not indexed by google, so only people that you will share the url with will be able to access them.
Once you are happy with your changes you can create a PR and merge them to the main or master branch.
Production Deployment
Any commit on the main or master branch will trigger a production deployment and your app url will be udpated with the latest code.
Lets merge our recording branch to master and see the production deployment in action.
Remove unused CSS
To remove all unused CSS from our final bundle we need to specify a path to all components and pages in the tailwind config.
module.exports = {
  purge: ["./src/pages/**/*.js", "./src/components/**/*.js"],
  ...
}
Now only the CSS classes used in any of the pages or components will be included in the final CSS file.
GitHub CLI
At the end of the video I have used GitHub CLI to create and merge PR into the master branch.
// create PR
gh pr create

// list PRs
gh pr list

// check PR
gh pr checks

// merge PR
gh pr merge
Vercel CLI
If you want to deploy straigh from a command line you can also use the Vercel CLI.
Check the documentation for more details on setup and the basic commands.